一、lamp简介
LAMP代表的就是:Linux系统下(Apache+MySQL(MariaDB)+PHP)这种网站服务器架构。
Linux是一类Unix计算机操作系统的统称,是目前最流行的免费操作系统。代表版本有:debian、centos、ubuntu、fedora、gentoo等。
Apache HTTP Server(简称Apache)是Apache软件基金会的一个开放源码的网页服务器,可以在大多数计算机操作系统中运行,由于其跨平台和安全性被广泛使用,是最流行的Web服务器端软件之一。它快速、可靠并且可通过简单的API扩展,将Perl/Python等解释器编译到服务器中。
MySQL是一个关系型数据库管理系统,由瑞典MySQL AB公司开发,属于Oracle旗下产品。MySQL是最流行的关系型数据库管理系统之一,在WEB应用方面,MySQL是最好的RDBMS(Relational Database Management System,关系数据库管理系统)应用软件之一。
PHP(Hypertext Preprocessor)是一种广泛使用的开源服务器端脚本语言,尤其适用于Web开发。它最初由Rasmus Lerdorf于1994年创建,旨在简化网页开发过程。PHP可以嵌入到HTML中,并与多种数据库集成,最常用的是MySQL。其灵活性、易学性和强大的社区支持使得PHP成为开发动态网页和Web应用程序的首选语言之一。PHP代码在服务器上执行,生成的HTML发送到客户端,从而实现网页的动态交互。它广泛应用于各种Web开发项目,包括内容管理系统、电子商务平台和社交媒体网站。
二、OwnCloud简介
OwnCloud是一个开源的私有云存储项目,支持跨平台使用,包括Windows、Mac、Linux、iOS和Android等操作系统。它提供了一个类似于百度云盘和OneDrive的功能,但用户可以完全掌控自己的数据。OwnCloud可以用于文件存储、同步、共享、版本控制、在线编辑、备份、加密等功能,并且支持插件扩展,可以增加更多功能如密码保护、邮件通知、日历、联系人
三、CentOS 7.9安装LAMP
1、Yum安装Apache
1)安装Apache
[root@localhost ~]# yum -y install httpd httpd-devel
2)启动Apache
[root@localhost ~]# systemctl start httpd
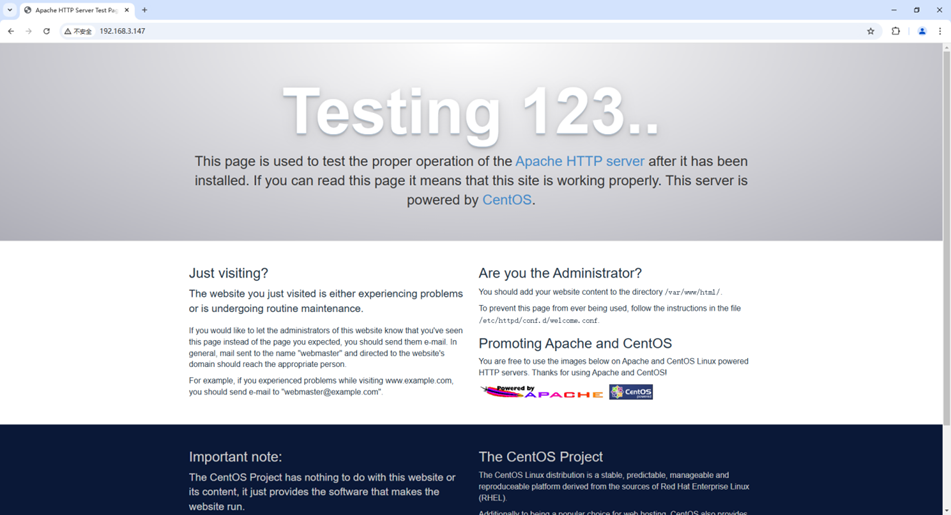
3)访问Apache
2、Yum安装MySQL
1)配置清华大学Yum源
[root@localhost ~]# vim /etc/yum.repos.d/mysql-community.repo
[mysql-connectors-community]
name=MySQL Connectors Community
baseurl=https://mirrors.tuna.tsinghua.edu.cn/mysql/yum/mysql-connectors-community-el7-$basearch/
enabled=1
gpgcheck=1
gpgkey=https://repo.mysql.com/RPM-GPG-KEY-mysql

[mysql-tools-community]
name=MySQL Tools Community
baseurl=https://mirrors.tuna.tsinghua.edu.cn/mysql/yum/mysql-tools-community-el7-$basearch/
enabled=1
gpgcheck=1
gpgkey=https://repo.mysql.com/RPM-GPG-KEY-mysql

[mysql-5.7-community]
name=MySQL 5.7 Community Server
baseurl=https://mirrors.tuna.tsinghua.edu.cn/mysql/yum/mysql-5.7-community-el7-$basearch/
enabled=1
gpgcheck=0
gpgkey=https://repo.mysql.com/RPM-GPG-KEY-mysql
2)安装MySQL-5.7
[root@localhost ~]# yum -y install mysql-community-server
3)启动MySQL
[root@localhost ~]# systemctl start mysqld
4)登录MySQL
1、查看初始化后生成的密码
[root@localhost ~]# grep 'password' /var/log/mysqld.log
2022-12-14T07:48:14.697319Z 1 [Note] A temporary password is generated for root@localhost: 5pqcdhU=_btr
2、登录MySQL
[root@localhost ~]# mysql -uroot -p'5pqcdhU=_btr'
mysql: [Warning] Using a password on the command line interface can be insecure.
Welcome to the MySQL monitor. Commands end with ; or \g.
Your MySQL connection id is 3
Server version: 5.7.44
Copyright (c) 2000, 2023, Oracle and/or its affiliates.
Oracle is a registered trademark of Oracle Corporation and/or its
affiliates. Other names may be trademarks of their respective
owners.
Type 'help;' or '\h' for help. Type '\c' to clear the current input statement.
# 初始化后需重置密码才能执行sql
mysql> set password=password('Aa123456@!');
Query OK, 0 rows affected, 1 warning (0.00 sec)
mysql> select version();
+-----------+
| version() |
+-----------+
| 5.7.44 |
+-----------+
1 row in set (0.00 sec)
3、Yum安装PHP
1)安装remi扩展源
remi源是Remi repository是包含最新版本PHP和MySQL包的Linux源,由Remi 提供维护。有这个源之后,使用Yum安装或更新PHP、MySQL、phpMyAdmin等服务器相关程序的时候就非常方便了。
[root@localhost ~]# yum -y install epel-release
[root@localhost ~]# yum -y install http://rpms.remirepo.net/enterprise/remi-release-7.rpm
2)安装Yum管理工具
[root@localhost ~]# yum -y install yum-utils
3)安装PHP
[root@localhost ~]# yum -y install php74-php-cli php74-php-common php74-php-devel php74-php-embedded php74-php-fpm php74-php-gd php74-php-mbstring php74-php-mysqlnd php74-php-pdo php74-php-opcache php74-php-xml php74-php-soap php74-php-imagick php74-php-intl php74-php-zip php74-php-bcmath
4)建立软连接
[root@localhost ~]# ln -sf /opt/remi/php74/root/usr/bin/php* /usr/bin
5)查看PHP版本
[root@localhost ~]# php -v
PHP 7.4.33 (cli) (built: Feb 14 2023 08:49:52) ( NTS )
Copyright (c) The PHP Group
Zend Engine v3.4.0, Copyright (c) Zend Technologies
with Zend OPcache v7.4.33, Copyright (c), by Zend Technologies
6)配置PHP
[root@localhost ~]# vim /etc/opt/remi/php74/php-fpm.d/www.conf
[www]
listen = 0.0.0.0:9000
listen.mode = 0666
user = apache
group = apache
pm = dynamic
pm.max_children = 12
pm.start_servers = 4
pm.min_spare_servers = 4
pm.max_spare_servers = 12
pm.max_requests = 10000
rlimit_files = 10240
7)启动PHP-FPM
[root@localhost ~]# systemctl start php74-php-fpm
8)设置开机自启动
[root@localhost ~]# systemctl enable php74-php-fpm
9)整合Apache和PHP
[root@localhost ~]# sed -i 's/index.html/index.php index.html/' /etc/httpd/conf/httpd.conf |grep index.html
[root@localhost ~]# sed -i '/^DocumentRoot/s/"$/\/owncloud"/' /etc/httpd/conf/httpd.conf |grep ^DocumentRoot
[root@localhost ~]# echo "<FilesMatch .php$>" >> /etc/httpd/conf/httpd.conf
[root@localhost ~]# echo " setHandler \"proxy:fcgi://127.0.0.1:9000\"" >> /etc/httpd/conf/httpd.conf
[root@localhost ~]# echo "</FilesMatch>" >> /etc/httpd/conf/httpd.conf
10)重启Apache
[root@localhost ~]# systemctl restart httpd
四、CentOS 7.9部署OwnCloud
1)下载owncloud安装包
[root@localhost ~]# wget -c https://download.owncloud.com/server/stable/owncloud-latest.zip
2)解压并授权
[root@localhost ~]# yum -y install unzip
[root@localhost ~]# unzip owncloud-latest.zip -d /var/www/html
[root@localhost ~]# chown -R apache:apache /var/www/html/owncloud
3)创建OwnCloud数据库及授权
[root@localhost ~]# mysql -uroot -p'Aa123456@!'
mysql: [Warning] Using a password on the command line interface can be insecure.
Welcome to the MySQL monitor. Commands end with ; or \g.
Your MySQL connection id is 4
Server version: 5.7.44 MySQL Community Server (GPL)
Copyright (c) 2000, 2023, Oracle and/or its affiliates.
Oracle is a registered trademark of Oracle Corporation and/or its
affiliates. Other names may be trademarks of their respective
owners.
Type 'help;' or '\h' for help. Type '\c' to clear the current input statement.
mysql> create database owncloud character set utf8 collate utf8_bin;
Query OK, 1 row affected (0.00 sec)
mysql> grant all on owncloud.* to owncloud@'localhost' identified by 'Owncloud@123';
Query OK, 0 rows affected, 1 warning (0.00 sec)
mysql> flush privileges;
Query OK, 0 rows affected (0.00 sec)
4)OwnCloud安装配置
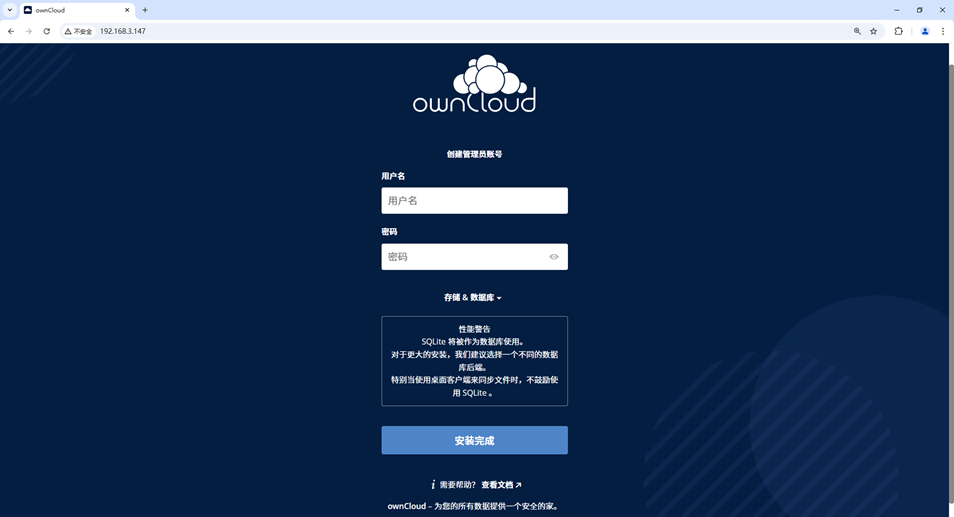
1、浏览器访问:http://192.168.3.147,如下图所示
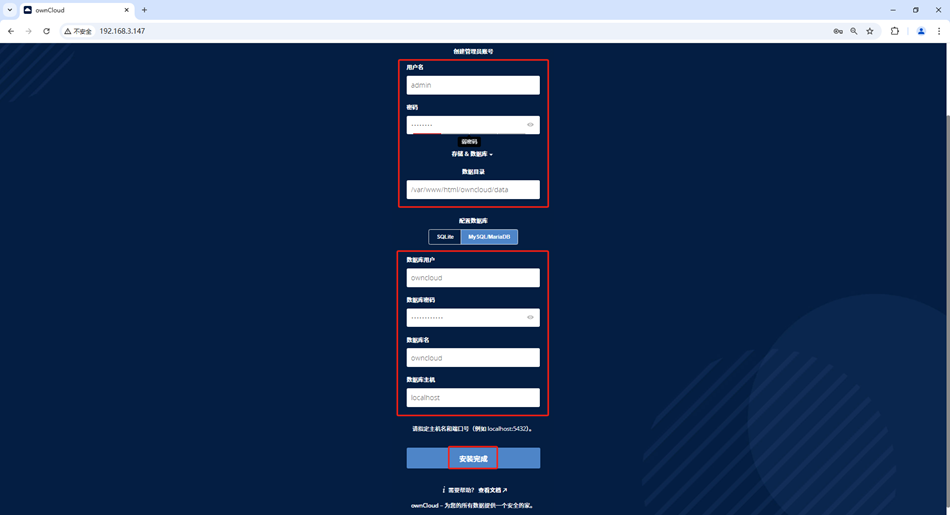
2、创建管理员账号,输入用户名、密码及填写数据库名、用户名、密码和数据库主机信息,填写完成后点击完成安装按钮
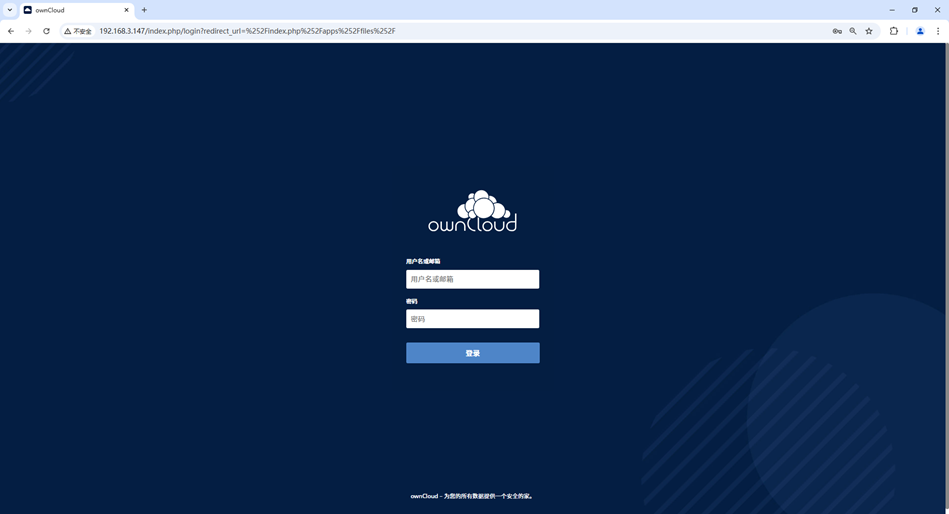
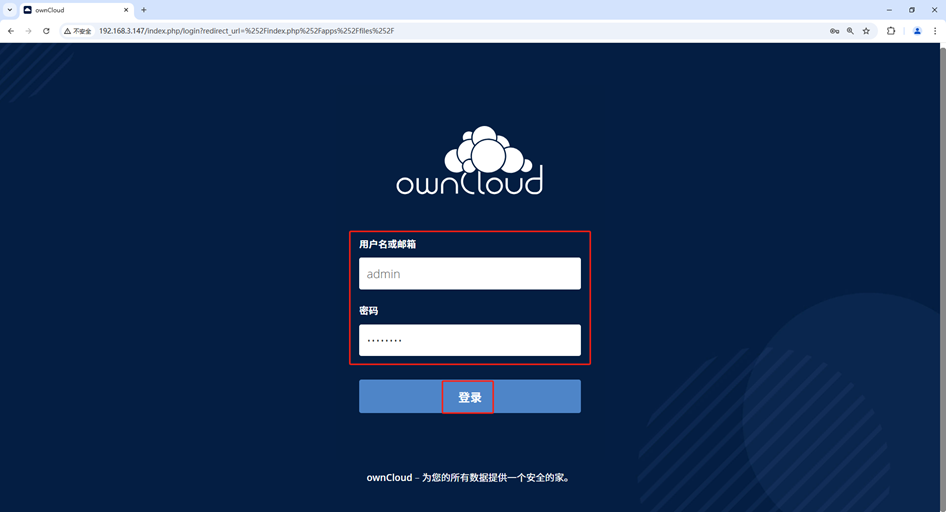
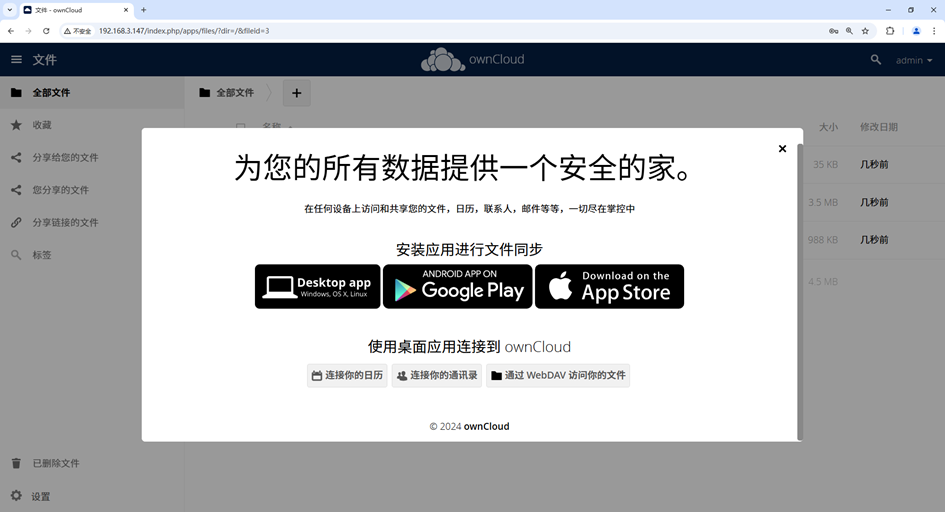
3、登录OwnCloud
# 输入刚才配置好的用户名和密码,如下图所示
若文章图片、下载链接等信息出错,请在评论区留言反馈,博主将第一时间更新!如本文“对您有用”,欢迎随意打赏,谢谢!


评论